How to Do a Bicep Heart
A bicep heart uses the curve of one bent arm and the hand from your opposite arm to outline a small heart. Lift one arm, bring the other hand across, and adjust the space between them until the shape reads clearly on camera. The final reveal is the part to practise first.
This bicep heart pose tutorial follows the single-person version shown on BicepHeart. You can use either arm. Start slowly in front of your phone, find a comfortable position, then add the smile or short introduction you want in your clip.
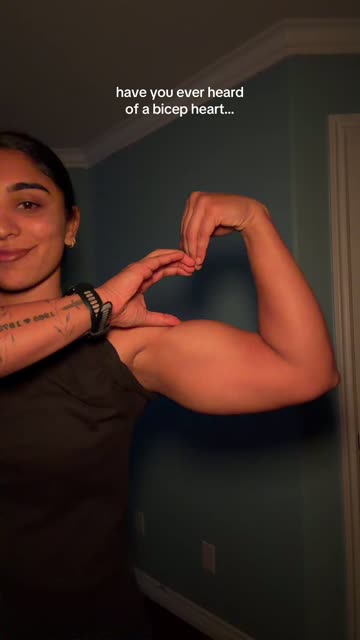
Build the bicep heart pose in four steps
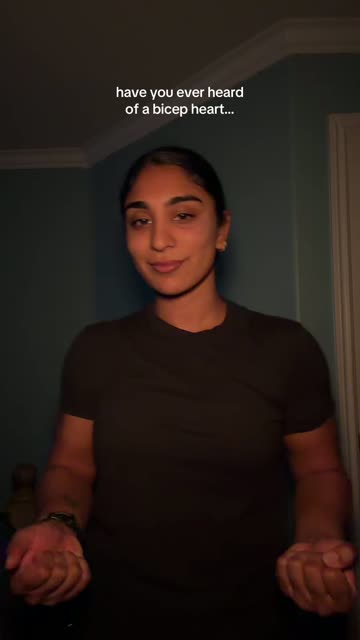
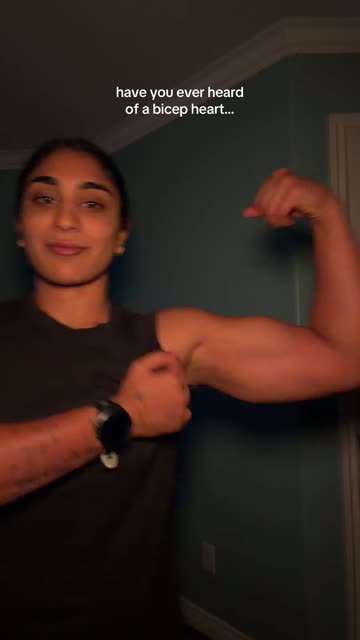
Frames from the original trend reference. These pictures show the gesture; they are not results from this generator.
1. Give your arms room
Stand or sit where your shoulders, elbows and hands fit inside the camera view. Begin with both arms relaxed. A waist-up frame is a useful starting point because it gives you room to move without making your face tiny.
Choose which arm will bend upward. We will call this your bent arm; the hand on your other arm will complete the bicep heart. You do not need to copy the screen direction of someone else’s video.
2. Raise one arm into a gentle flex
Bend that elbow and bring your loosely closed fist near the side of your head. Keep the upper arm visible and leave space between your arm and your face. Look at the outline in your phone preview.
The bicep heart pose needs a curve the camera can see. You do not need to make your arm look bigger or hold a strenuous flex. If your elbow leaves the picture, move the camera back before changing the gesture.
3. Bring your opposite hand across
Move the free hand toward the inside of your bent arm. Curve the fingers and thumb so that the hand helps close a small heart-shaped space beside the bicep. Watch the gap between the shapes, rather than concentrating only on where the fingertips touch.
People’s hands and proportions differ. Try a small adjustment to the free hand instead of forcing your wrist into a sharp bend. The useful position is one you can hold comfortably while the outline remains visible.
4. Turn slightly, check the gap, and hold
Keep the bicep heart together and rotate your upper body a little toward the camera. Stop where you can see the heart-shaped gap most clearly. Sometimes a small change of angle reveals a shape that was already there.
Hold the bicep heart pose for a brief moment before lowering your arms. That pause gives viewers time to recognize it. Once the ending feels familiar, practise moving into it from your relaxed starting position.
Which arm should you use?
Either arm can be the bent arm in this bicep heart pose tutorial. Choose the side that feels easier to arrange and keep it consistent while practising. The opposite hand always supplies the other part of the shape.
A front-camera preview may be mirrored. That can make a demonstration look reversed, but it does not change the relationship between your own arms. Think “my bent arm” and “my opposite hand,” rather than “the left side of the screen.” Watch the saved recording once if the preview and finished clip look different.
Make the bicep heart visible to the camera
A bicep heart can feel correctly arranged while looking like an ordinary flex from another angle. The camera needs to see the space you have created. If your hand sits directly in front of the gap, it can hide the shape even though the hand position feels close.
Start with the phone roughly facing your upper body. Keep its position steady, then make small changes to your own angle. Changing the camera, your arms and your hand at the same time makes it harder to tell which adjustment helped.
Look for separation between the outline of your arm and the background. A plain wall and even light make that outline easier to inspect. Loose sleeves, dark shadows or a busy pattern behind your elbow can make a small bicep heart harder to read.
You can practise the bicep heart pose in a mirror, but judge the final version through the camera you plan to use. A mirror, a front camera and a phone placed off to one side show different views.
If the bicep heart shape is unclear
Use this part of the bicep heart pose tutorial as a quick reset. Change one thing, check the preview, and keep the adjustment only if it helps.
| What you see | Try this first |
|---|---|
| A flex, but no visible heart | Check the small gap beside the bicep. Reposition the opposite hand a little. |
| The palm covers the shape | Turn slightly so the camera can see between the hand and bent arm. |
| A cramped shape beside your face | Give the raised arm more room in the frame. |
| The elbow disappears | Move the phone farther away and check the entire movement. |
| The shape appears, then collapses | Practise the final hold before speeding up the transition. |
A larger crop or clearer angle may help more than flexing harder. If you keep chasing a very small detail, lower your arms and start again. A recognizable bicep heart with a relaxed expression is a better filming target than an uncomfortable pose held for a long time.
Film a short bicep heart clip
Once you can form the shape, record a simple take with three beats. You can use your phone’s ordinary camera and choose your own timing.
Begin with a little space. Look toward the lens with your arms relaxed. Leave a moment before moving so the viewer can see the change. A quiet smile works; you do not need to act out a long introduction.
Move into the bicep heart. Raise your chosen arm and bring the opposite hand into place at a pace you can control. Keep the phone steady. If you want a playful reveal, let the heart become clear before changing your expression.
Finish with a hold. Give the final bicep heart pose a short pause. A smile, small nod or simple still ending is enough. Keep recording for a moment after the hold so you have room to trim the ending.
Watch the clip at its normal speed before editing. Then pause at the reveal to check whether the heart-shaped gap is visible. A still frame can help you inspect the shape, but the full movement tells you whether viewers have enough time to notice it.
Check your take before posting
This bicep heart pose tutorial is complete when the movement reads clearly in your own recording. Check that both the bent arm and the opposite hand stay in frame, your face remains visible, and the final hold lasts long enough to recognize.
Add text where it leaves the gesture clear. A caption across the hand can cover the very detail you worked on. Choose a short line that matches the mood, and leave the hand and arm visible.
A few practical questions
Do I need large biceps?
The bicep heart depends on a visible outline made by the arm and hand. Focus on positioning and camera angle rather than changing your appearance. Your finished shape may look different from another person’s.
Should my hands meet above my head?
This bicep heart pose tutorial teaches the small heart beside one bent arm. Keep your attention on that arm and the opposite hand. An overhead two-hand heart is a different gesture.
Can I make a version from a photo?
Yes. BicepHeart offers a prepared AI effect for a photo of one consenting adult. The generated movement and appearance can vary. Follow the separate Bicep Heart AI video tutorial, or start with your photo when you prefer that route.
For a real filmed bicep heart, keep practising the final shape first. Once it reads clearly, the transition and your expression make the clip your own.