How to Make a Bicep Heart AI Video From a Photo
To make a Bicep Heart AI video, choose one clear photo, open the generator, select your video quality and generate the clip. The prepared movement raises one arm into a flex while the opposite hand curves against the bicep to form a small heart. You do not need to record that movement yourself.
The useful part of the process starts before you press Generate: choosing a photo that gives the arms enough room. This guide walks through that choice, the actual generation steps and the details to check before downloading your Bicep Heart video.
Create your Bicep Heart video
Your photo uploads only when you choose Generate.
Before you make a Bicep Heart video
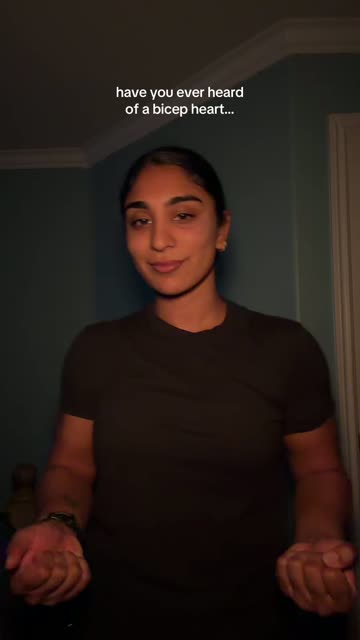
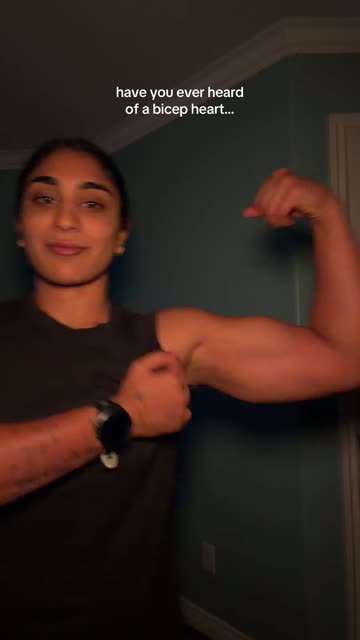
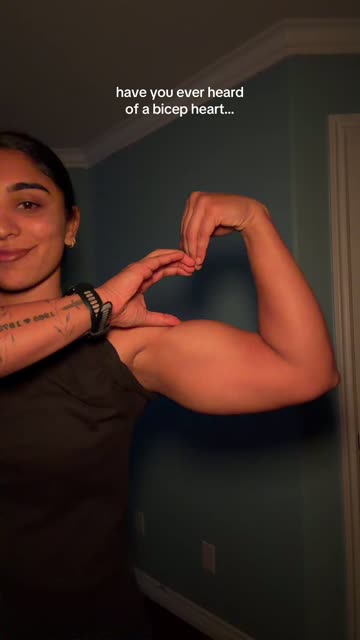
Frames from the original trend reference. These pictures show the gesture; they are not results from this generator.
Have a JPG, PNG or WebP up to 10 MB ready. Use a photo of yourself or one adult who has agreed to this use. The current output is an approximately 7-second vertical MP4 in a 9:16 frame. You can choose 480p or 720p.
The homepage sample demonstrates the original trend gesture. It is labelled as a reference, so treat it as a guide to the movement rather than proof of what your own result will look like.
1. Choose a photo with room for the Bicep Heart
Start with your face, shoulders and upper body visible. Keep both arms inside the picture where possible, with space around the elbows. A close selfie may show your face clearly while leaving the generator very little information about the rest of the pose.
You do not have to make a Bicep Heart in the starting image. Relaxed arms are fine: the prepared scene supplies the movement. A straightforward photo is more useful than trying to imitate the final shape with a blurred or awkwardly cropped picture.
Look at the image at its normal size. Can you distinguish the eyes and facial outline? Are the shoulders easy to separate from the background? Is another person partly visible? Choose even light and an uncomplicated composition. Avoid sunglasses, strong beauty filters and group shots.
If you have two suitable photos, prefer the one with clearer arms over the one with a more dramatic expression. This is a practical starting choice, not a guarantee that the generated hands or face will match perfectly.
2. Preview the image before starting
Open the Bicep Heart generator and select your photo. Check the preview for the same things you checked in the original file: one person, a recognizable face and enough upper-body space.
Selecting the photo creates a preview; the site says the image uploads when you choose Generate. Use this moment to replace an unsuitable picture. There is no advantage in submitting a photo you already know cuts off both elbows.
You do not need to upload the trend clip or paste a Bicep Heart AI prompt. The Bicep Heart AI template provides the prepared effect. The picture you choose provides the person’s visual reference.
3. Sign in and choose Bicep Heart video quality
Sign in with Google, then check the quality and credit amount shown in the creator. Both settings use the same approximate duration and vertical format.
| Quality | Credits per generation | A practical reason to choose it |
|---|---|---|
| 480p | 10 | You want to try a photo at the lower listed credit cost. |
| 720p | 20 | You want a larger output frame for viewing and sharing. |
A higher resolution does not promise more accurate fingers or a better heart shape. It describes the output size. Your photo and the generated movement still matter.
If you need credits, read the current pricing before purchasing. Confirm the setting again before you submit your Bicep Heart AI video. A new generation is a separate attempt, so make changes deliberately rather than treating repeated clicks as a way to improve an existing result.
4. Generate once, then follow that request
Read the consent statement, confirm that you can use the adult’s photo, and choose Generate when the picture and settings are ready.
After submission, follow the status shown by the tool. If the Bicep Heart video is still processing, return to that request or open My videos with the same account. A second submission is not a shortcut to finishing the first one.
If the page stops updating, check your existing videos before trying again. A confirmed failed request releases its reserved credits under the site’s current policy. For an unclear status, contact support with the request details before submitting again. This avoids guessing whether you are looking at a delayed result, a failed request or a different account.
5. Watch the whole Bicep Heart AI video
A convincing final frame can hide a problem earlier in the movement. Play the completed Bicep Heart video from beginning to end, then pause around the point where the hand meets the arm.
Check the face. Look for sudden changes as the head moves. A small expression change is different from the person becoming unrecognizable halfway through the clip.
Follow the arm. One arm should bend upward into the flex while the opposite hand travels toward it. Watch for an elbow that jumps, an arm that disappears or clothing that changes abruptly around the shoulder.
Find the heart. The recognizable Bicep Heart is a small shape formed beside the flexed bicep. An ordinary two-hand heart in front of the chest or above the head is a different gesture. Check the actual shape rather than accepting any heart-like pose.
Watch the ending. Make sure the final moment is usable and that the hand does not suddenly change shape. Listen to the downloaded file too; music in a reference preview does not establish which audio is present in your Bicep Heart AI video.
6. Download your Bicep Heart video
Save the MP4 once you have reviewed it. The site asks you to download completed results within 7 days, so keep a local copy if you want to use the clip later.
Watch that saved copy before uploading it elsewhere. Add a caption that suits the person you are sending it to, and check any music you choose in the publishing app. A Bicep Heart video can be a playful reply, a gym-post ending or a small message to someone; it does not need a long explanation.
Describe it as AI-generated where needed so viewers understand how it was made.
If your Bicep Heart AI video looks wrong
| What you notice | What to check before another attempt |
|---|---|
| The arms look crowded or incomplete | Return to the starting photo. Look for cut-off elbows, crossed arms or an unusually tight crop. |
| The face changes during movement | Check whether the original is sharp, unobstructed and free of heavy filters. |
| The result makes a different heart gesture | Compare the movement with the site’s reference. A larger resolution alone does not address the wrong pose. |
| You cannot find the result | Open My videos using the same Google account before starting a new request. |
Change one relevant thing at a time. If you replace the photo and change several other choices at once, you learn less about what helped. Keep expectations realistic: even a well-prepared Bicep Heart AI video can contain visual errors.
Questions while making a Bicep Heart video
Do I need to know how to do the pose?
No. The prepared effect supplies the movement. If you would rather film yourself, use the Bicep Heart pose guide for the physical steps.
Can I write a prompt to change the result here?
The current creator uses a prepared effect and has no prompt field. To experiment with text instructions, use a separate tool that accepts prompts.
Should I keep clicking Generate while I wait?
No. Check the existing Bicep Heart video request and its status first. Starting another request is a separate action, not a refresh of the one already processing.
Does the photo need to show a gym or large muscles?
No. The gesture is the point. Choose clear upper-body framing over a gym background or an exaggerated flex.
Ready to make your Bicep Heart AI video?
Choose a clear photo, check the displayed credits and give the result a careful watch. Keep the Bicep Heart that works for your message.